
Introduction
Building a todo app is common practice when you are trying to learn a new tech stack. In this tutorial, I'll show you how to build a todo app using the follwing stack:
- Next.js for the JavaScript framework
- Chakra-UI for the CSS framework
- Firebase for the auth and backend
- React hooks for handling data locally
Let's jump into coding!
Bootstrapping With next-firebase-auth
I will be building this like any other project. This means, I will not be starting from scratch. Instead, we will be cloning this repo which has Firebase Auth already implemented. Go ahead and clone the repo and then cd into the example folder. This is the Next.js source code.
As a reminder, you can clone this repo from your terminal using:
git clone https://github.com/gladly-team/next-firebase-auth.git

then...

cd example
Once you have the starter files, feel free to open them up in the IDE of your choice.
.env.local
You will notice that if you try to run the app (using yarn dev) you will get an error. This is because we need to edit the secret values inside of .env.local.example to our Firebase values. First, copy everything inside of .env.local.example into a new file named .env.local.
# Copy this file as ".env.local".
# Update these with your Firebase app's values.
FIREBASE_CLIENT_EMAIL=my-example-app-email@example.com
NEXT_PUBLIC_FIREBASE_PUBLIC_API_KEY=MyExampleAppAPIKey123
NEXT_PUBLIC_FIREBASE_AUTH_DOMAIN=my-example-app.firebaseapp.com
NEXT_PUBLIC_FIREBASE_DATABASE_URL=https://my-example-app.firebaseio.com
NEXT_PUBLIC_FIREBASE_PROJECT_ID=my-example-app-id

# Your Firebase private key.
# When using Vercel, add the private key with double quotes
# via the CLI, not the Vercel dashboard:
#   vercel secrets add firebase-private-key '"my-key-here"'
# Then, use `JSON.parse` in the app. See:
# https://github.com/vercel/vercel/issues/749#issuecomment-707515089
FIREBASE_PRIVATE_KEY='"some-key-here"'

# Secrets used to sign cookies.
COOKIE_SECRET_CURRENT=someSecretValue
COOKIE_SECRET_PREVIOUS=anotherSecretValue

# Cookie options.
NEXT_PUBLIC_COOKIE_SECURE=false # set to true in HTTPS environment
Next, create a Firebase project and create a web project inside of it.
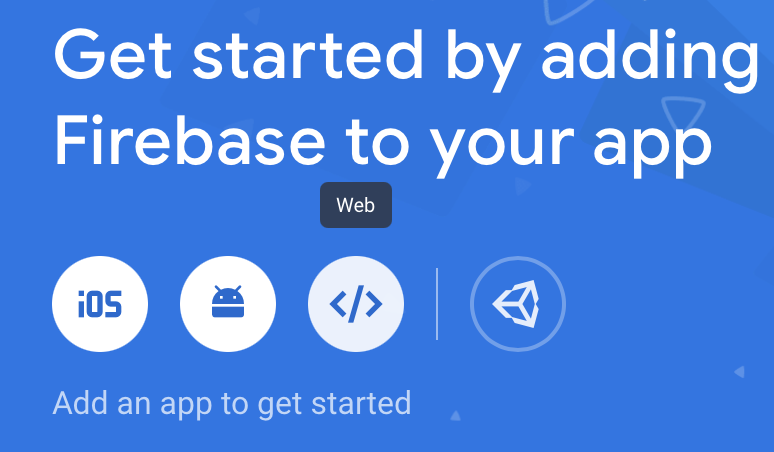
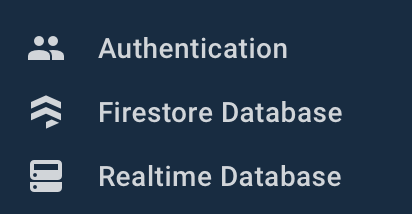
Go ahead and turn on Email/Password auth, cloud firestore and realtime db.
Now, go into project settings. In the general tab, you will find most of your secret values.
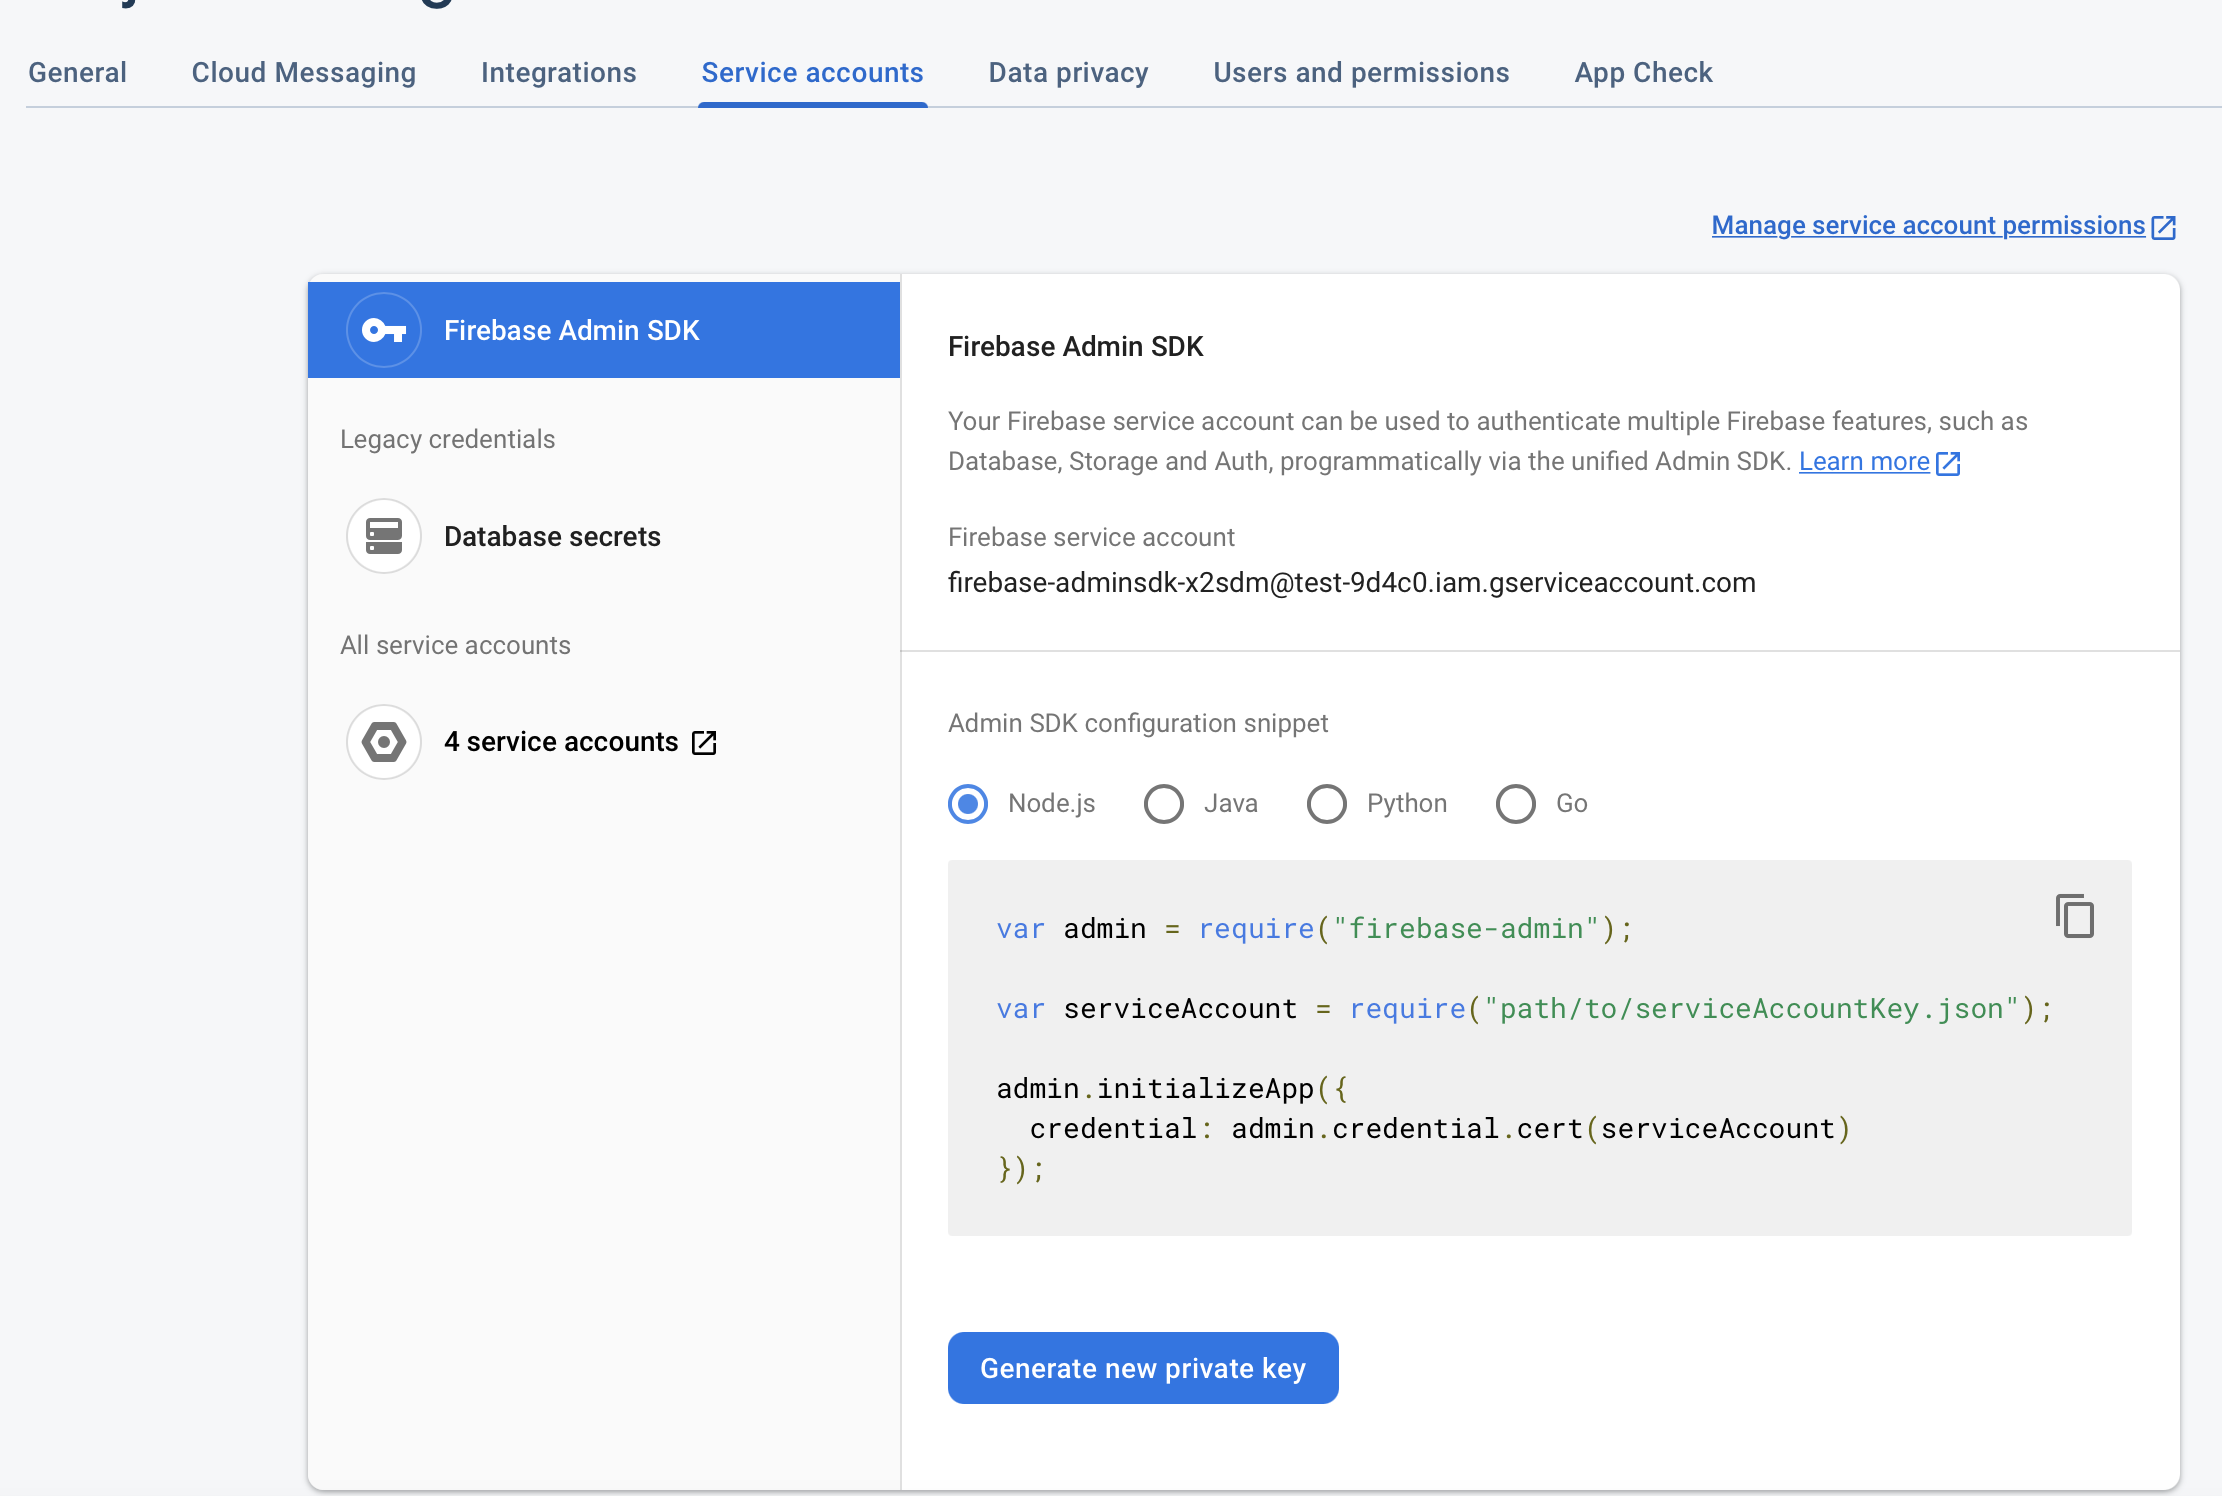
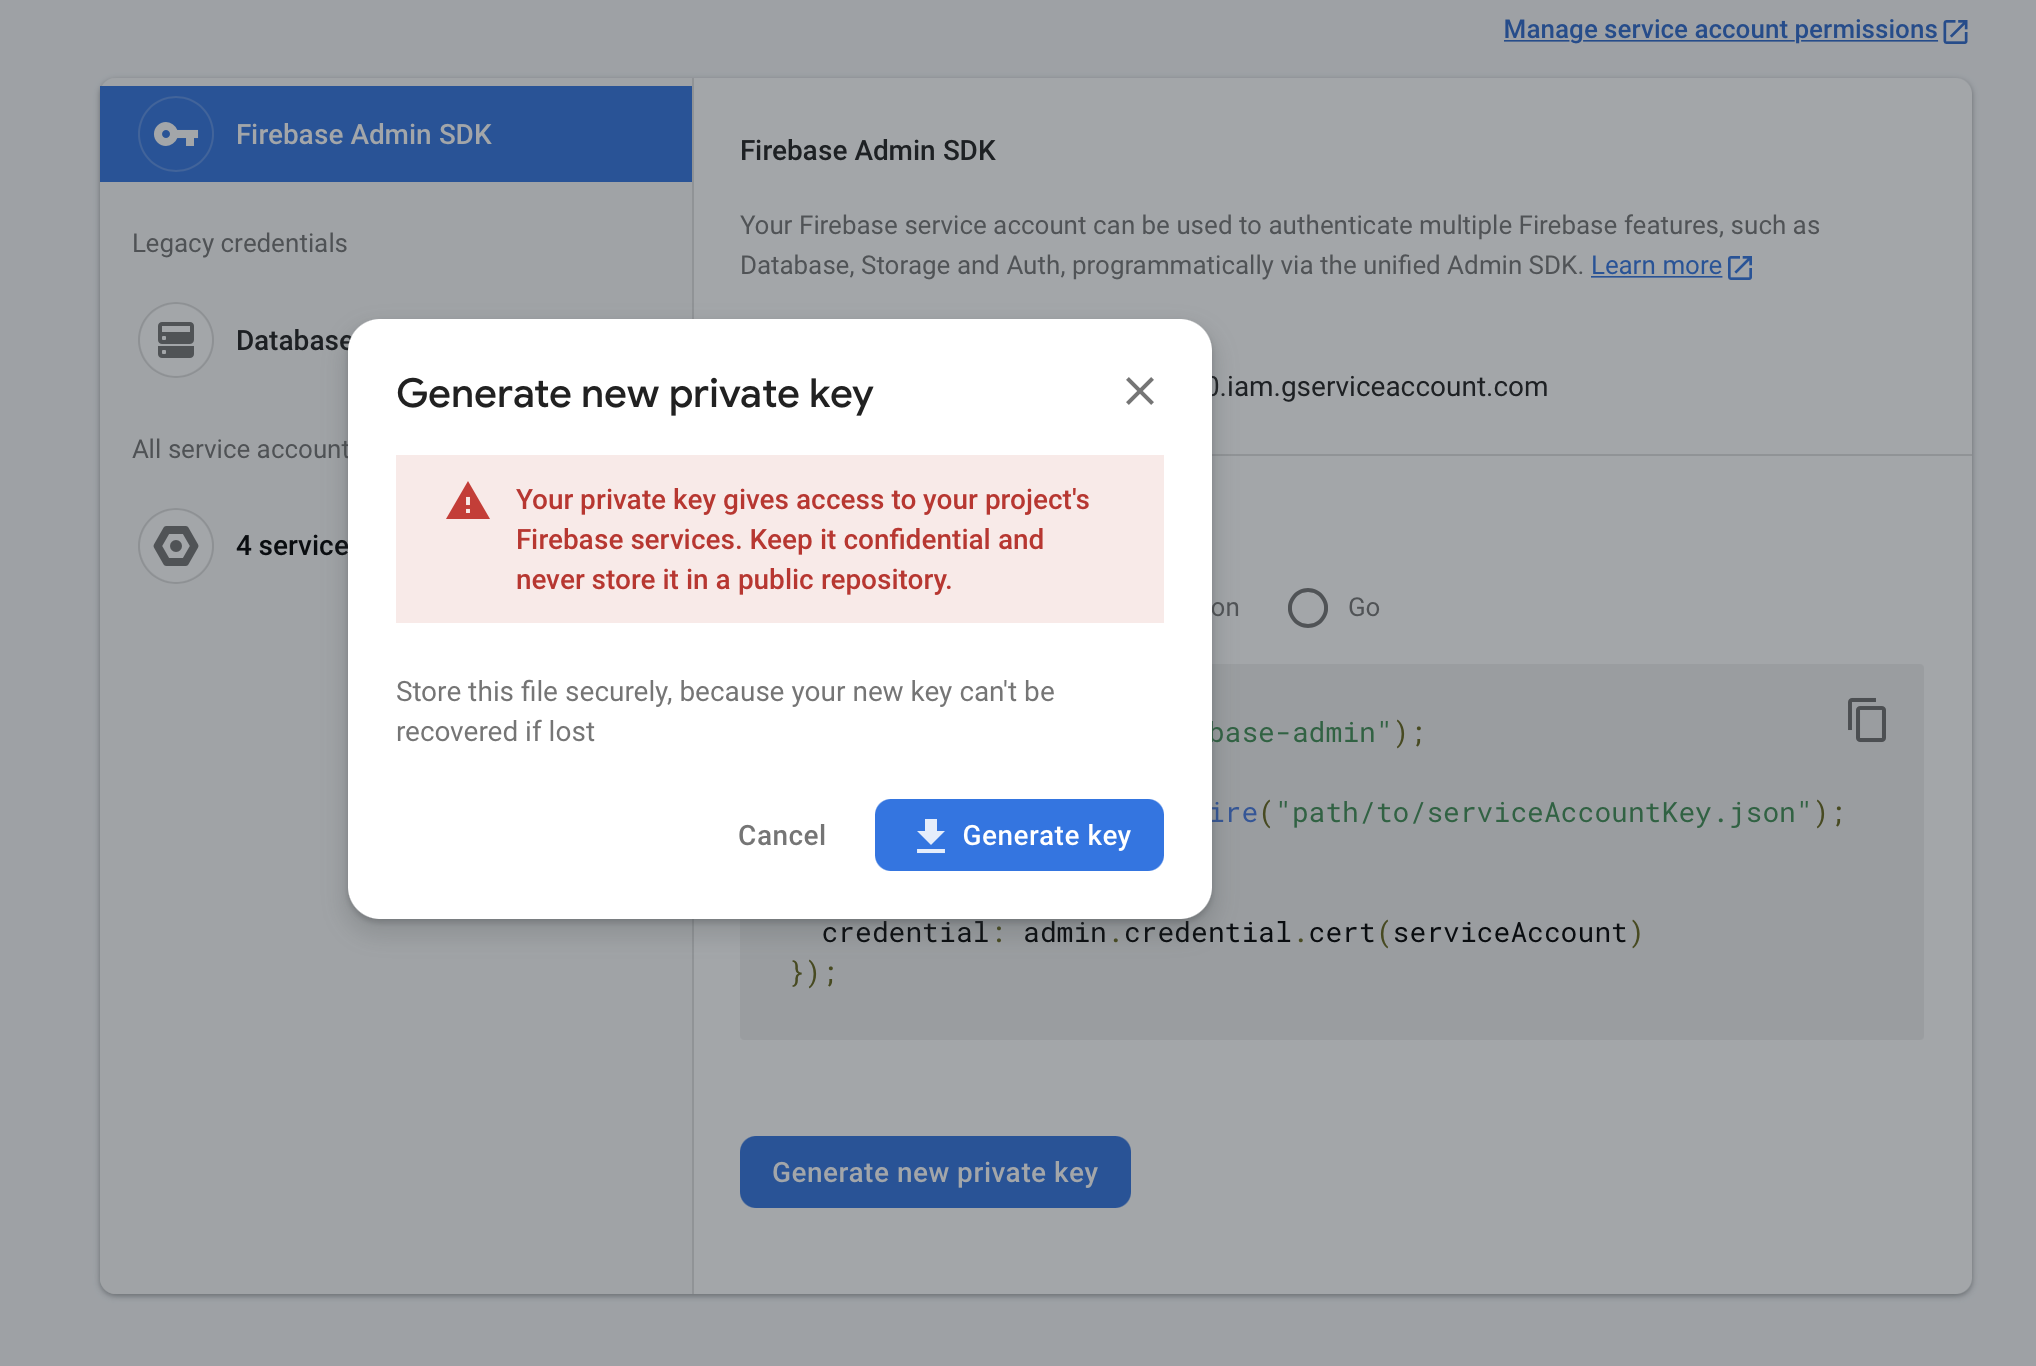
To get the remaining values, click the "Service Accounts" tab and "Generate a New Private Key." Open the file that is downloaded. The remaining secret values such as the api key (the super long string) can be found in here.
For the 2 cookie secrets, simply generate 2 random strings!
At this point, you should be able to log into the site using email and password.
Adding Chakra-UI
Add Dependencies
Once this is complete, we can add Chakra-UI to our project. First add the dependencies:
yarn add @chakra-ui/react @emotion/react@^11 @emotion/styled@^11 framer-motion@^4
Wrap With ChakraProvider
Next, wrap _app.js with the <ChakraProvider>.
import React from 'react'
import '../styles/globals.css'
import initAuth from '../utils/initAuth'
import { ChakraProvider } from "@chakra-ui/react" // <- add this

initAuth()

function MyApp({ Component, pageProps }) {
  // eslint-disable-next-line react/jsx-props-no-spreading
  return (
    <ChakraProvider> // <- add this
      <Component {...pageProps} />
    </ChakraProvider> // <- add this
  )
}

export default MyApp
Creating todo.js
All of the code in this turoial will be added in a file named todo.js. You can go ahead and create this inside of the pages directory.
We will start by adding a bunch of imports.
Adding The Imports
import React, { useState, useEffect } from 'react'
import {
    Flex,
    Heading,
    InputGroup,
    InputLeftElement,
    Input,
    Button,
    Text,
    IconButton,
    Divider,
} from "@chakra-ui/react"
import { AddIcon, DeleteIcon, StarIcon } from "@chakra-ui/icons"
import {
    useAuthUser,
    withAuthUser,
    withAuthUserTokenSSR,
    AuthAction,
} from 'next-firebase-auth'
import getAbsoluteURL from '../utils/getAbsoluteURL'
import firebase from 'firebase/app'
import 'firebase/firestore'
- line 1 are react imports
- lines 2-13 are chakra ui imports
- lines 14-20 are
next-firebase-authimports - lines 21-22 are firebase imports
Defining Our Body
Next, define our react functional component with some basic styles:
// imports here

const Todo = () => {
    return (
        <Flex flexDir="column" maxW={800} align="center" justify="center" minH="100vh" m="auto" px={4}>

        </Flex>
    )
}

export const getServerSideProps = withAuthUserTokenSSR()

export default withAuthUser()(Todo)
I'll go ahead and add the rest of the UI elements.
<Flex flexDir="column" maxW={800} align="center" justify="center" minH="100vh" m="auto" px={4}>
    <Flex justify="space-between" w="100%" align="center">
        <Heading mb={4}>Welcome, {AuthUser.email}!</Heading>
        <IconButton ml={2} onClick={AuthUser.signOut} icon={<StarIcon />} />
    </Flex>

        <InputGroup>
            <InputLeftElement
                pointerEvents="none"
                children={<AddIcon color="gray.300" />}
            />
            <Input type="text" placeholder="Learn Chakra-UI & Next.js" />
            <Button
                ml={2}
            >
                Add Todo
            </Button>
        </InputGroup>
</Flex>
If you run the app you should see some nice output!
Writing Data to Firebase's Cloud Firestore
useState
To write data to cloud firestore, we will first need to get the data from the user and hold it locally. We can use useState for this. Add the
following code:
const [input, setInput] = useState('')
const [todos, setTodos] = useState([])
Now we can store the users input value in the input variable and when we fetch the data back, we can store it in the
todos variable.
onClick + onChange
To get the data, we can use onClick and onChange.
<InputGroup>
        <InputLeftElement
            pointerEvents="none"
            children={<AddIcon color="gray.300" />}
        />
        <Input type="text" onChange={(e) => setInput(e.target.value)} placeholder="Learn Chakra-UI & Next.js" />
        <Button
            ml={2}
            onClick={() => sendData()}
        >
            Add Todo
        </Button>
    </InputGroup>
If you add some console.logs and type in some data, you will see that this works! The next step is to create the sendData method and send the data to Firebase.
We can wrap everything inside of a try catch loop to handle errors. To interact with Firestore, we can use firebase.firestore().
We will store each users todo's inside of their own collection using their id. Each individual toto will be stored inside a doc, using the todo name and the doc name.
Sending The Data
Lastly, use .set to set the data! We'll pass in the timestamp as well so we can order todos better later on.
const sendData = () => {
        try {
            // try to update doc
            firebase
                .firestore()
                .collection(AuthUser.id) // each user will have their own collection
                .doc(input) // set the collection name to the input so that we can easily delete it later on
                .set({
                    todo: input,
                    timestamp: firebase.firestore.FieldValue.serverTimestamp(),
                })
                .then(console.log('Data was successfully sent to cloud firestore!'))
        } catch (error) {
            console.log(error)
        }
    }
Fetching Data from Firebase's Cloud Firestore
We can fetch data in a similar fashon. We'll fetch everything inside of useEffect so we can listen to changes in real time.
useEffect(() => {
        AuthUser.id &&
            firebase
                .firestore()
                .collection(AuthUser.id)
                .orderBy('timestamp', 'desc')
                .onSnapshot(snapshot => {
                    setTodos(snapshot.docs.map(doc => doc.data().todo))
                })
    })
Now, we have all the todo items inside of the todos variable! Let's map over them and display it to the user.
Displaying Todos To User
{todos.map((t, i) => {
                return (
                    <>
                        {i > 0 && <Divider />}
                        <Flex
                            key={i}
                            w="100%"
                            p={5}
                            my={2}
                            align="center"
                            borderRadius={5}
                            justifyContent="space-between"
                        >
                            <Flex align="center">
                                <Text fontSize="xl" mr={4}>{i + 1}.</Text>
                                <Text>{t}</Text>
                            </Flex>
                            <IconButton onClick={() => deleteTodo(t)} icon={<DeleteIcon />} />
                        </Flex>
                    </>
                )
            })}
Adding Delete
Lastly, let's add delete functionality. as you can see, we already have the deleteTodo method. Let's create this above.
To delete, we can grab the collection, grab the doc, and call .delete. Recall the collection name is the user's id and the doc name is the todo.
const deleteTodo = (t) => {
        try {
            firebase
                .firestore()
                .collection(AuthUser.id)
                .doc(t)
                .delete()
                .then(console.log('Data was successfully deleted!'))
        } catch (error) {
            console.log(error)
        }
    }
Conclusion
We have now created a todo web app with Firebase Auth, Next.js as the JS framework, Chakra UI as the CSS framework, Firebase Cloud Firestore as the backend, and React Hooks to handle data locally. If you want to look at any of these in more detail, check out the recommended posts below!